Building BibleMarker
This post is partly an announcement and partly a story about what happens when you combine a frustration you've had for years with AI tools that let you actually do something about it.
TLDR: I built a Bible study app. It's called BibleMarker and it's live now.
The frustration
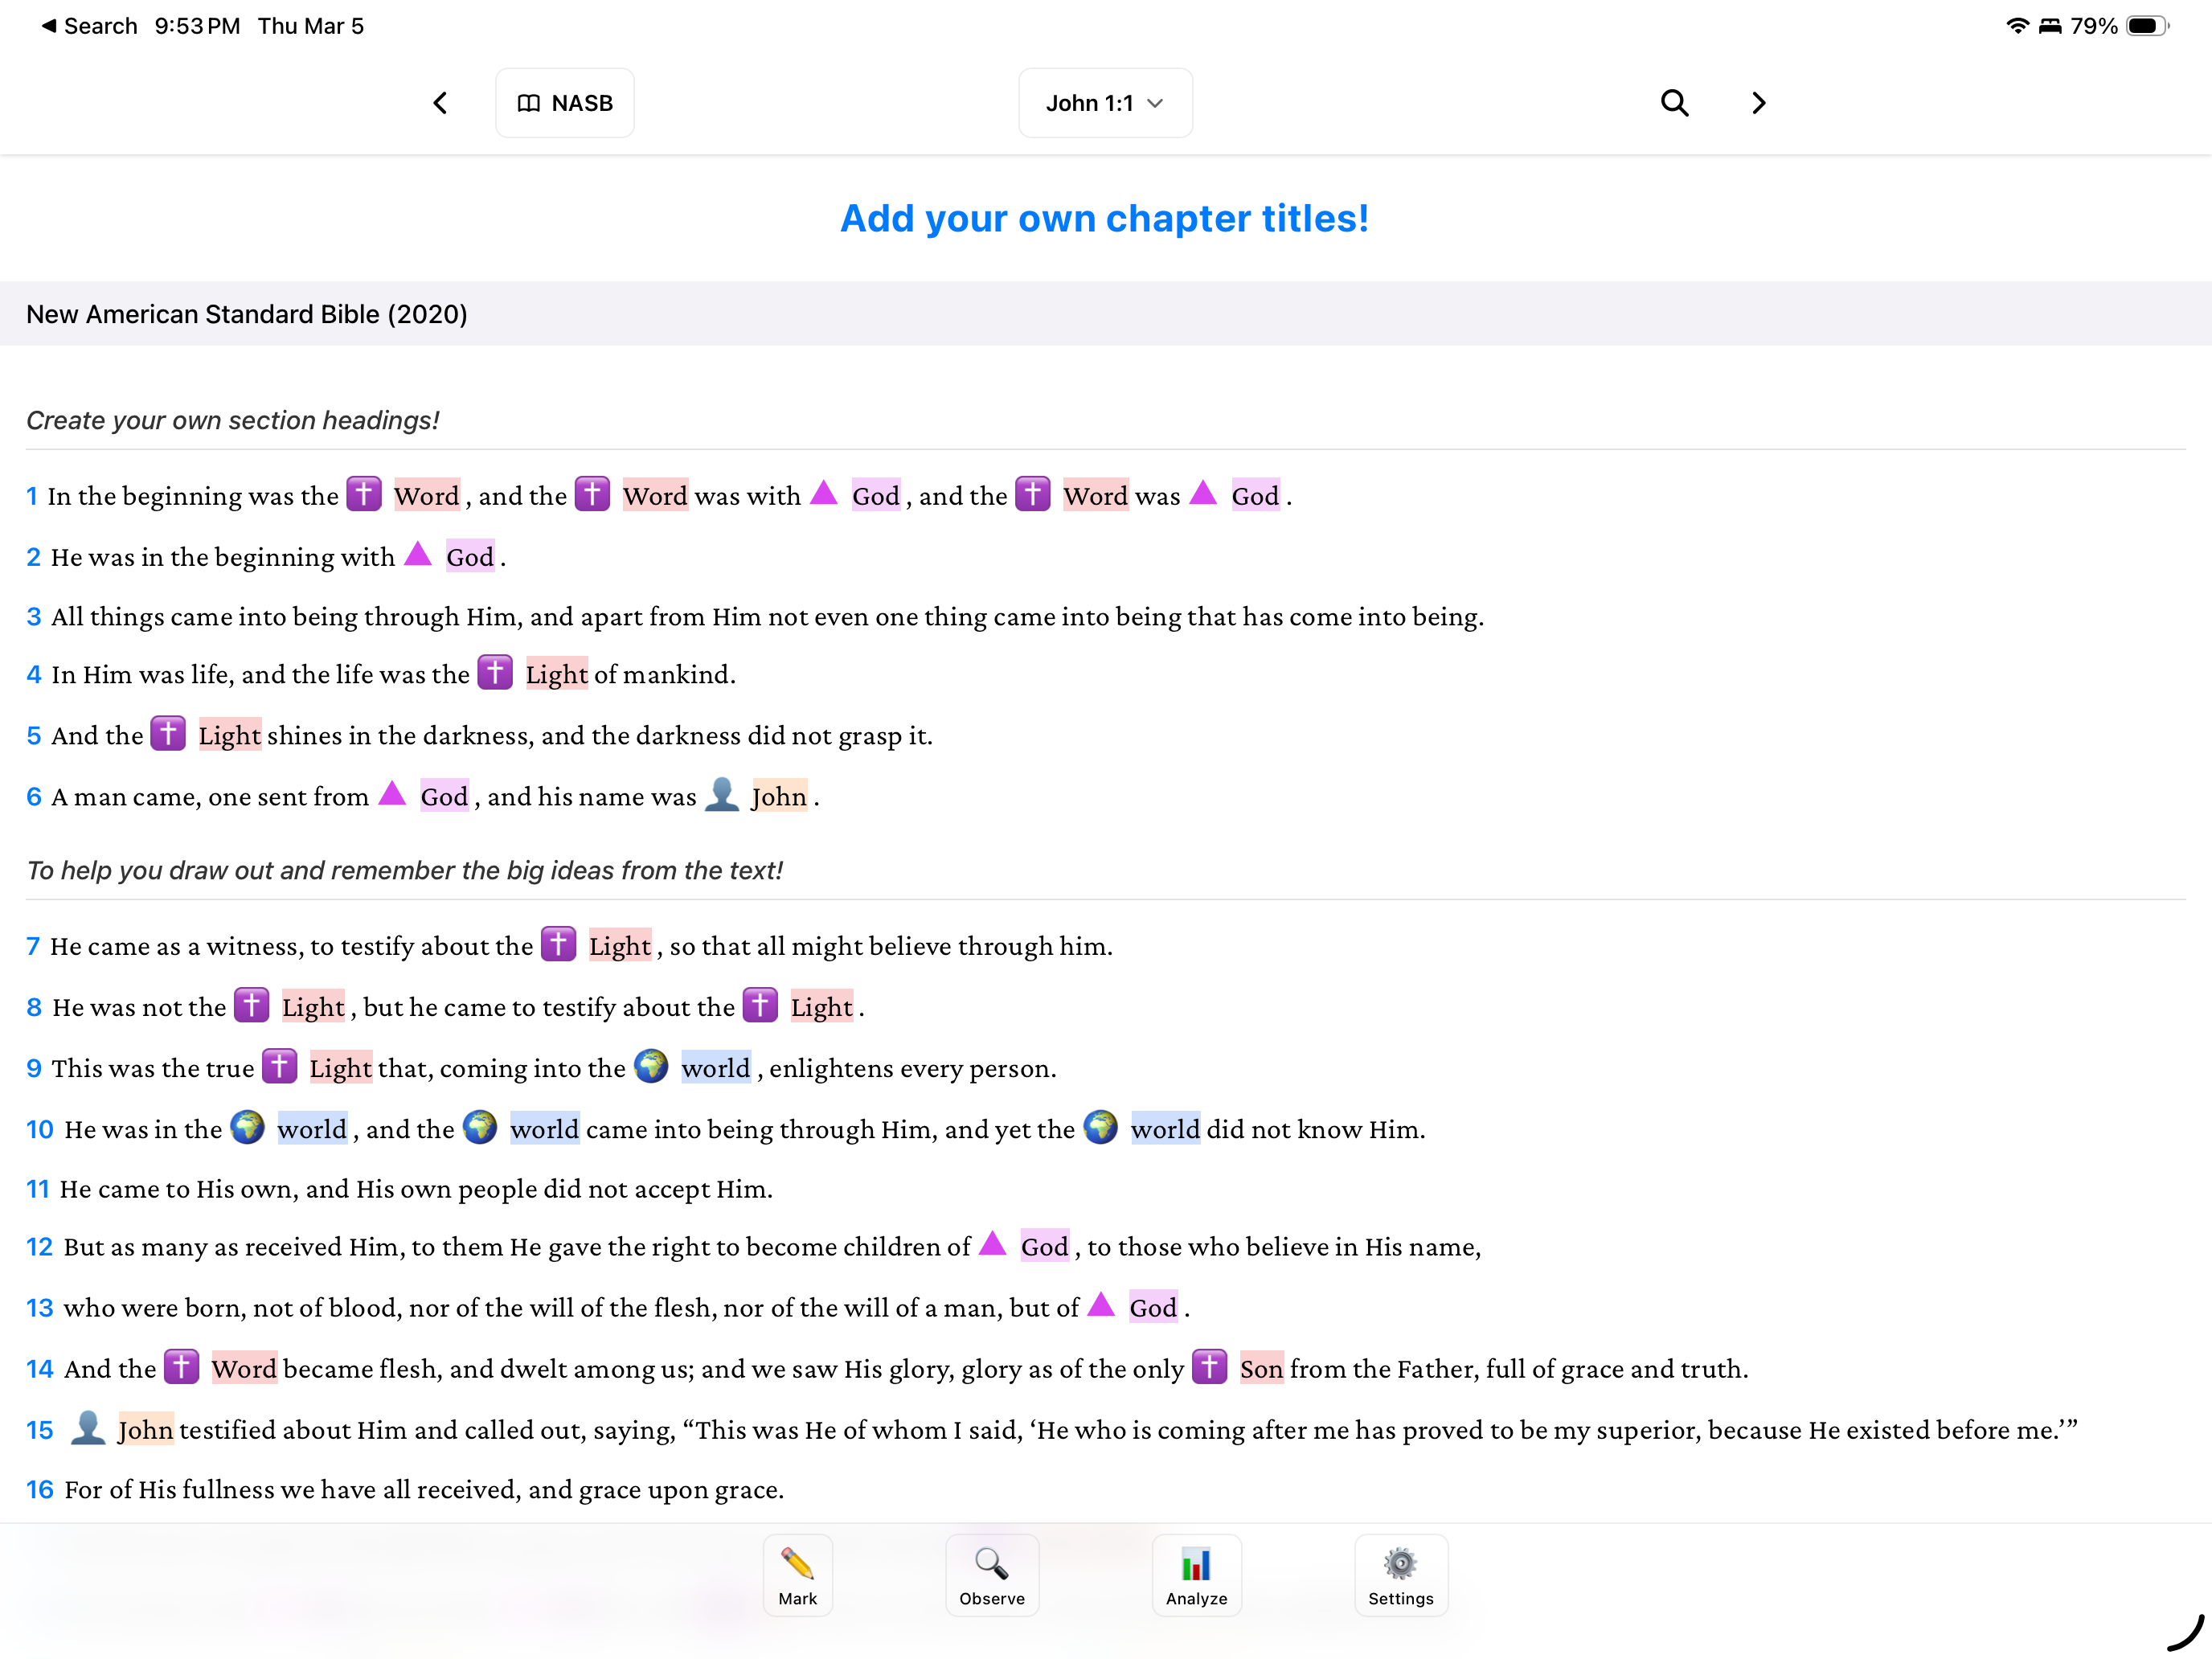
I've been doing Precepts Bible studies for a while now. The method is hands-on: you're reading the text, marking every occurrence of key words like "Jesus," "covenant," "grace" with specific colors and symbols, identifying who/what/when/where/why, tracking themes across chapters. It's a fair bit of work, rewarding but work.
I like using Bible software for this as you can see multiple versions side by side and so I wanted to start doing this work within the software. The problem is that none of the major Bible software are built for this. They're designed for highlighting phrases or verses or paragraphs. When you need to mark every single "Jesus" across a chapter and then do the same for "Lord" and "Spirit" and a dozen other words it's painfully tedious. You're clicking on individual words one at a time, over and over. The admin work starts to overshadow the actual study.
I've had the concept for a better tool in my head for years but I just never had the time to build it.
Learning AI by building something real
I'm a DevOps engineer. I've done a fair amount of web development but never built a real application before... something with a database, offline support, cross-platform builds. I decided this would be the project where I learned to work with AI coding tools.
I started in December with Cursor. It was fine for getting the early scaffolding together but I eventually switched to Claude Code. I live in the terminal, tmux, vim, the whole deal. Claude Code just dropped into another pane. Also at the time Opus 4.6 came out and this model was better for what I was doing.
The accidental feature
The thing that changed everything was an accident. I was working on the keyword system and wanted highlights to appear across multiple translations displayed side by side. I set up the matching logic and ran the build... and it highlighted every "Jesus" in the entire chapter automatically.
I stared at it for a second and realized this was the whole point. Instead of making users click on each word one at a time, the app could just do it. You define your keywords once and BibleMarker marks them everywhere they appear. You focus on the meaning of the text instead of the admin work of the study.
That auto-highlighting became a core feature. It's not as simple as it sounds though, you need case-sensitive matching ("LORD" vs "Lord" mean different things), the ability to dismiss false positives, support for multiple translations with different word orders, and the option to manually mark pronouns and references that can't be caught automatically. Getting the rules right took real work.
Beyond highlighting
Once the core study workflow clicked, I started thinking bigger. Not just "how do I highlight words" but "how do I make this tool more impactful for the person using it."
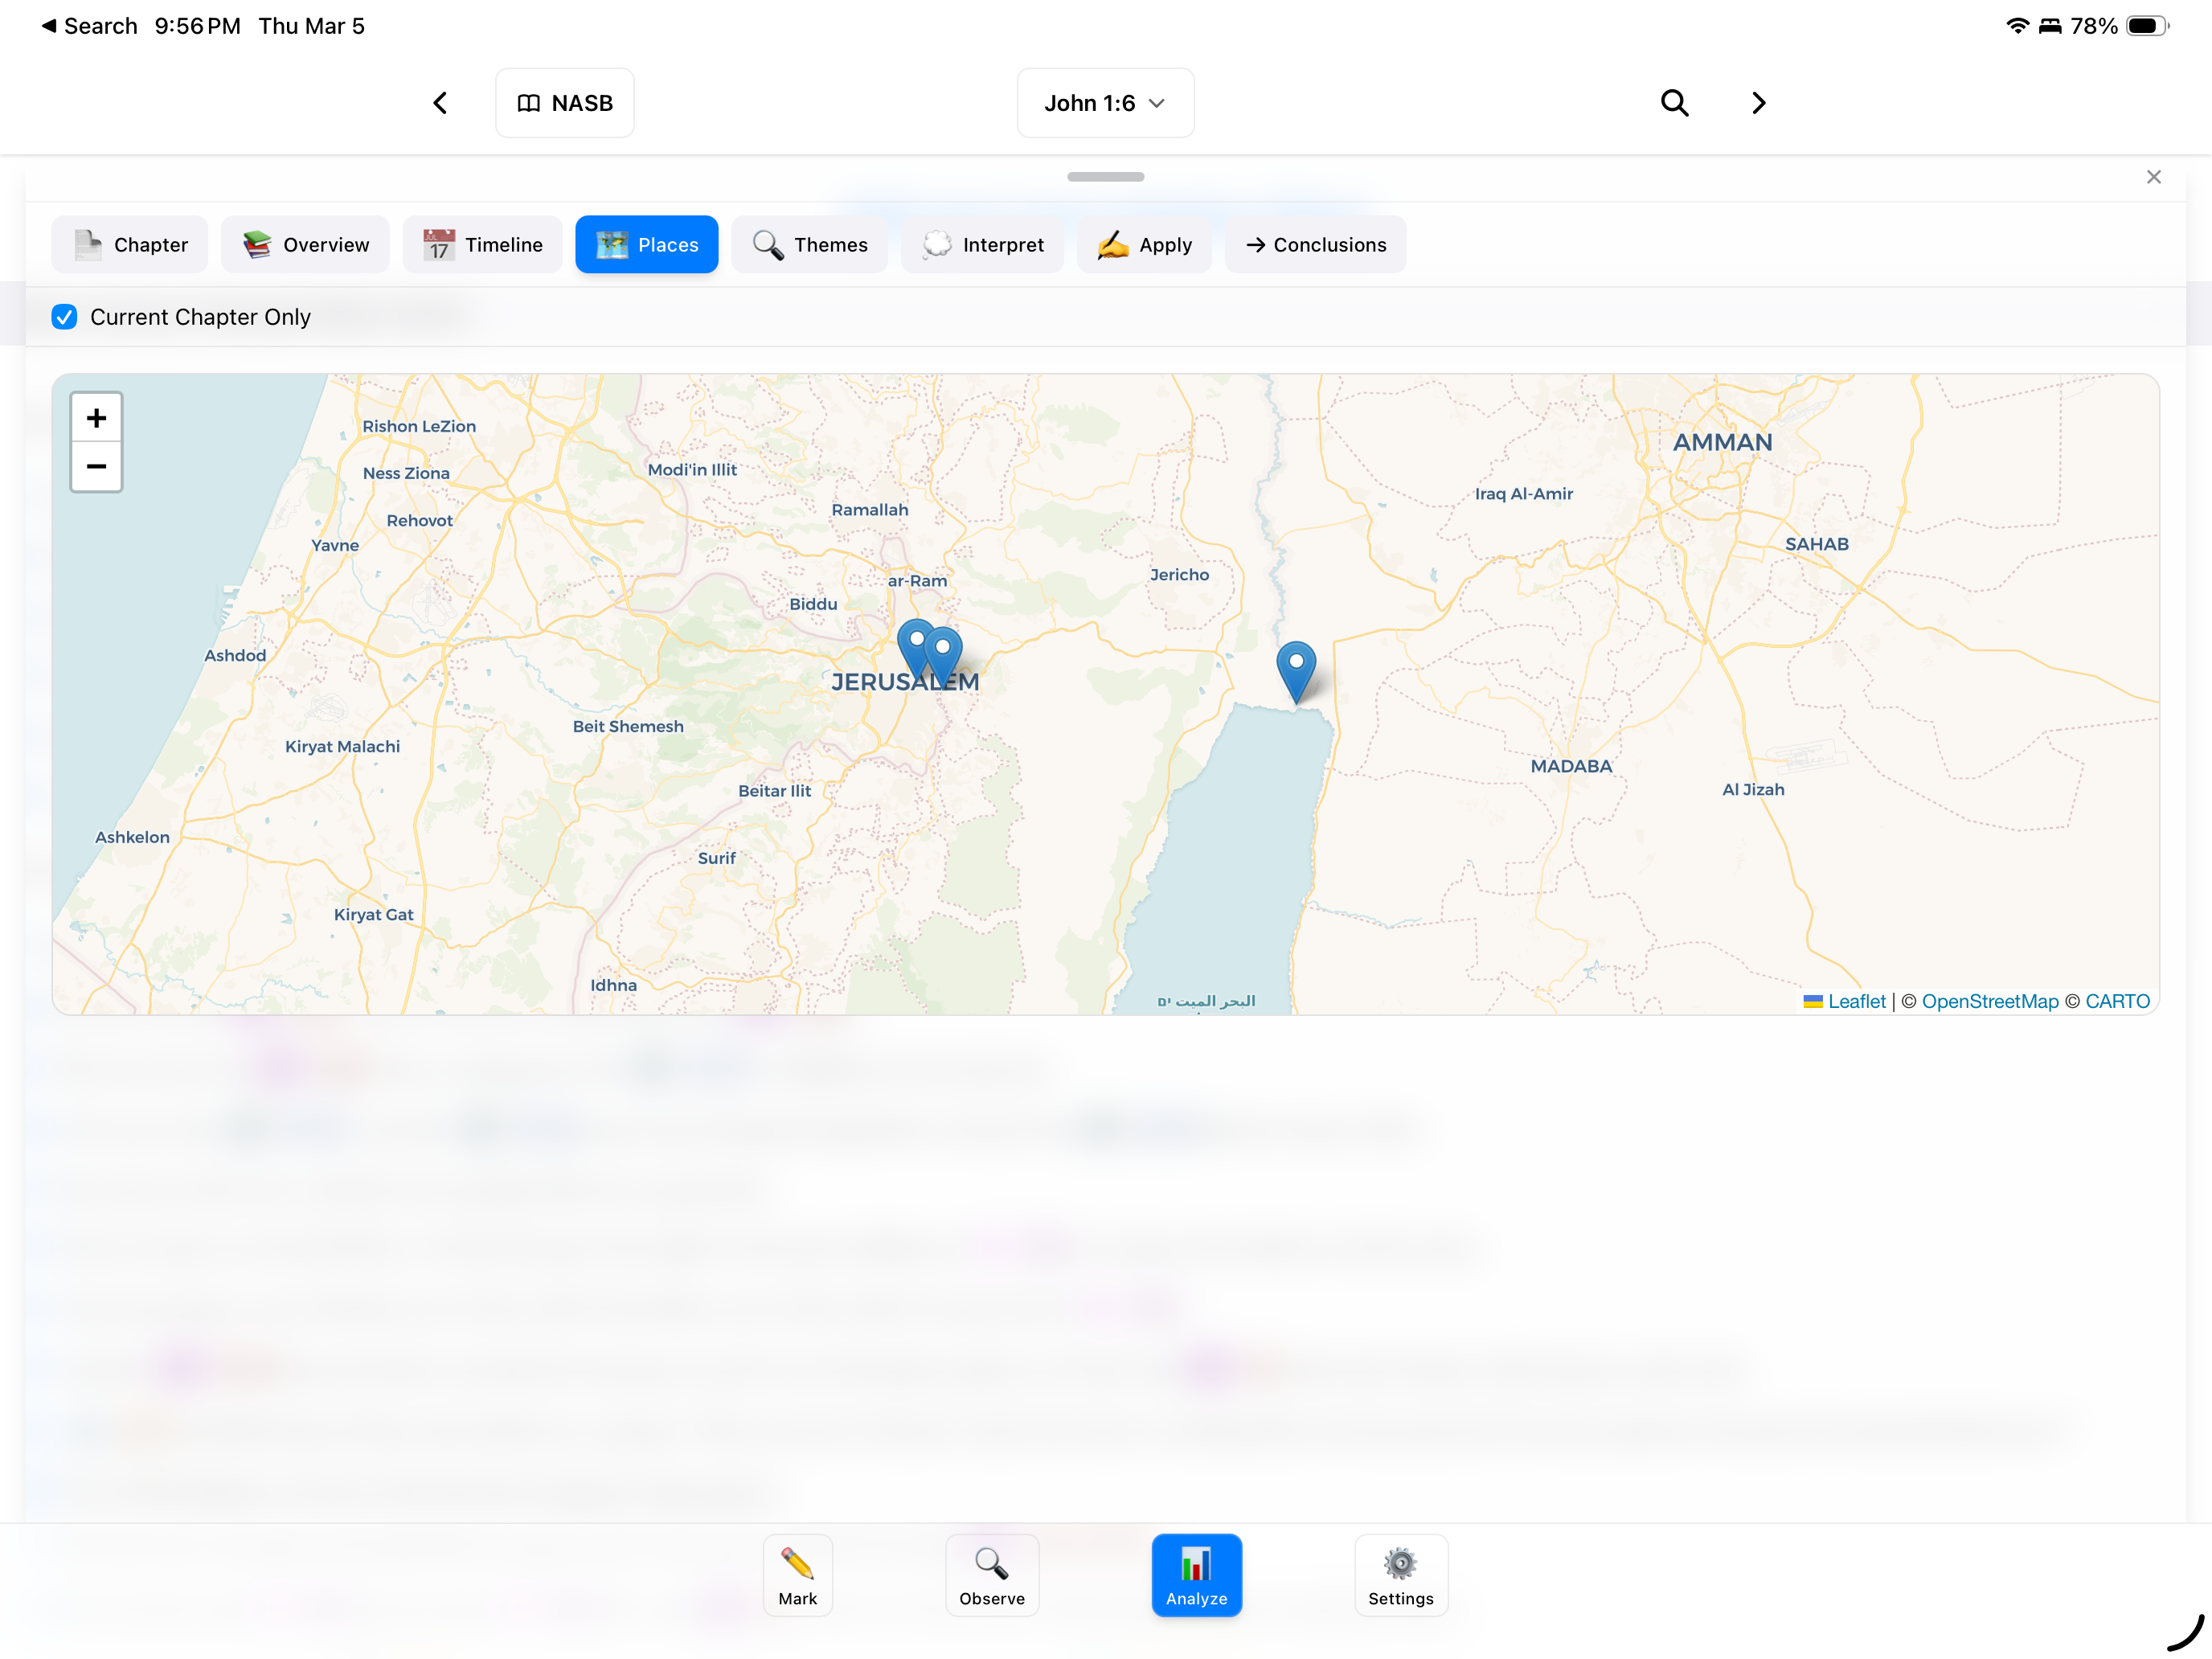
Maps. When you're reading about Paul traveling to Corinth or Abraham leaving Ur, it helps to see where those places actually were. BibleMarker now has interactive maps powered by OpenFreeMap with historical place data so you can see where events happened as you study.
Timelines. This is the next big piece. I want to show when events happened and when people lived, a visual sense of biblical chronology. I'm building a separate data project called GnosisTool that provides timeline data for people's lives and family trees. Right now some of this is manually entered but the data source is growing and will make the timeline feature much richer over the next month or so.
Observation tools. Tracking the 5 W's and H (who, what, when, where, why, how), identifying contrasts and conclusions, building lists of concepts... these are all part of the Precepts method and they're all in the app now.
What AI actually changed
A project like this would have taken me years as a side project. Working with Claude Code, it's taken months.
The biggest lesson wasn't about the AI writing code for me. It was about how I needed to change my approach. I'm normally a hands-on coder, I want to be in the code making decisions. With this project I stepped back and described what I wanted to accomplish. That meant spending more time planning, breaking problems into chunks that AI could work through, and being really clear about the desired outcome before touching any code.
That planning-first approach made me more productive even outside of AI. Turns out "describe exactly what you want before you start building" is just good engineering.
The tech stack would have been a wall by itself. BibleMarker is built with Tauri, React and TypeScript on the front end, Rust on the back end, cross-platform to macOS, Windows, Linux, and iOS. SQLite database, iCloud sync, offline SWORD Bible modules. I had never touched Rust or Tauri before. AI made it possible to learn the stack and build the product at the same time.
Try it
BibleMarker is live at biblemarker.app. It's a native app for macOS, Windows, Linux, and iOS. If you do inductive Bible study, or you've been wanting to but the tools out there felt like they were fighting you, give it a shot.